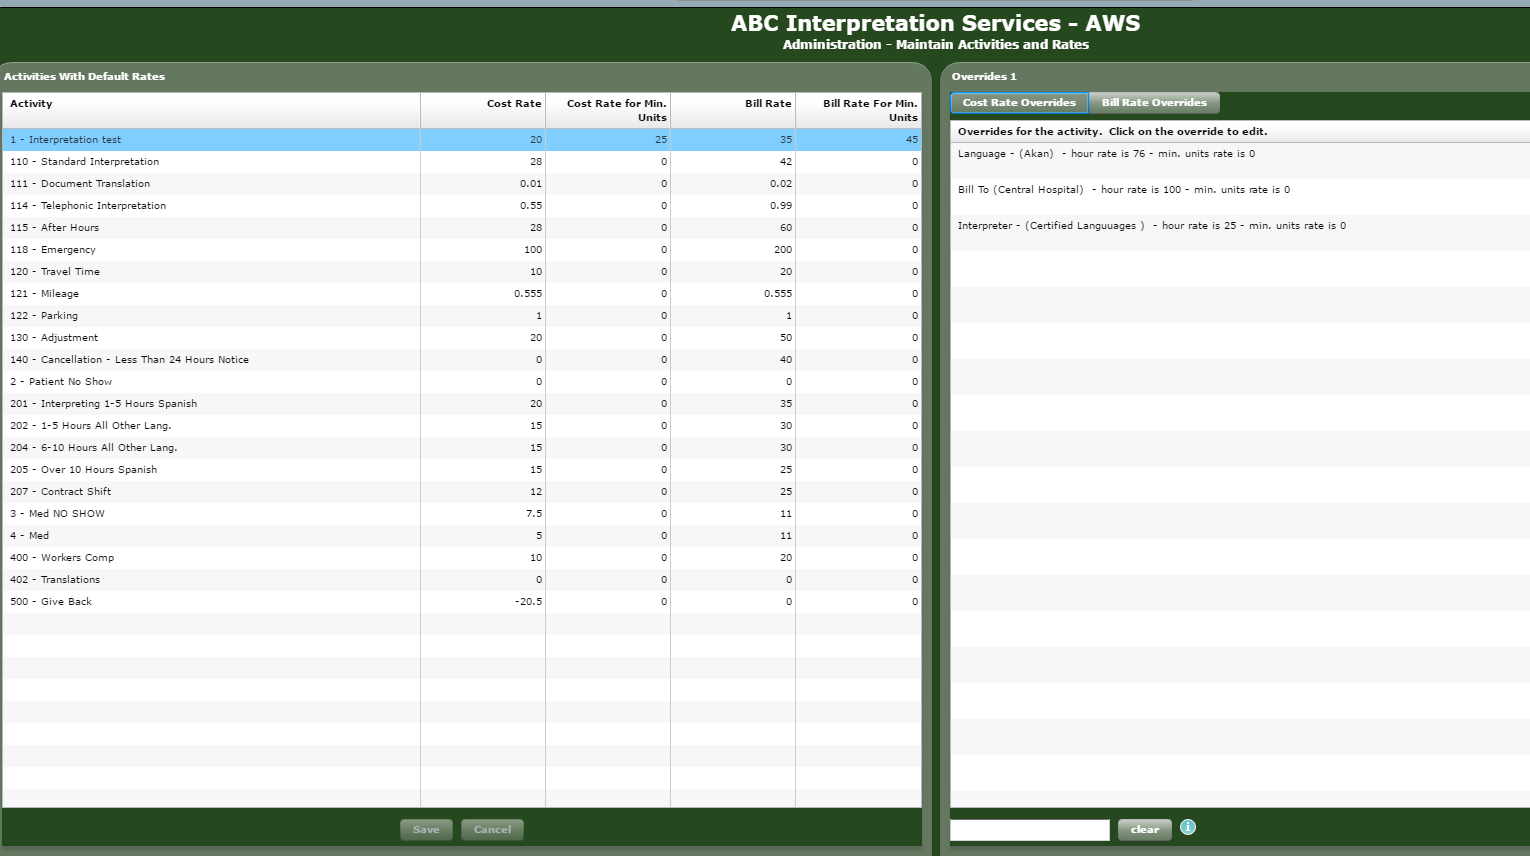
To begin, select Administration>Maintain Rates from the main menu. You will then see a screen similar to below. Starting with version 8.5, a new type of cost/bill rate/override can be created. It is explained below.

In the left table, the are 5 columns:
1. Activity - This is supplied by the system and that information comes from the information you entered in Administration>Maintain Activities.
2. Cost Rate - This is the amount per unit that is the default amount to be paid to the interpreter. If the third column amount is 0, then it is the rate that will be charged for all hours in this activity unless there is a Cost Override that applies on a specific request.
3. Cost Rate for Min. Units - If a different rate is to be paid for the minimum hour(s), while the remaining time is paid at the 'Cost Rate', then enter that rate here. For example: if the Cost Rate for Min is $25/hr and the Cost Rate is $20, the Activity Minimum Units is 2, and the job went for 3 hours, the Total Cost will be (2 * $25) + $20 = $70. If the Cost Rate for Min. Units were 0, then the total cost would calculate as (2 * $20) + $20 = $60.
4. Bill Rate - This is the amount per unit that is the default amount to be billed to the customer. As above, if the fifth column amount is 0, then it is the rate that will be billed for all hours in this activity unless there is a Bill Override.
5. Bill Rate for Min. Units - If there is a different amount to be billed for the minimum hour(s), it will calculate in the manner corresponding to Cost Rate. Keep in mind, that you do not have to have a value in this column simply because there is one in column 3 and vice versa.
How to do Overrides:
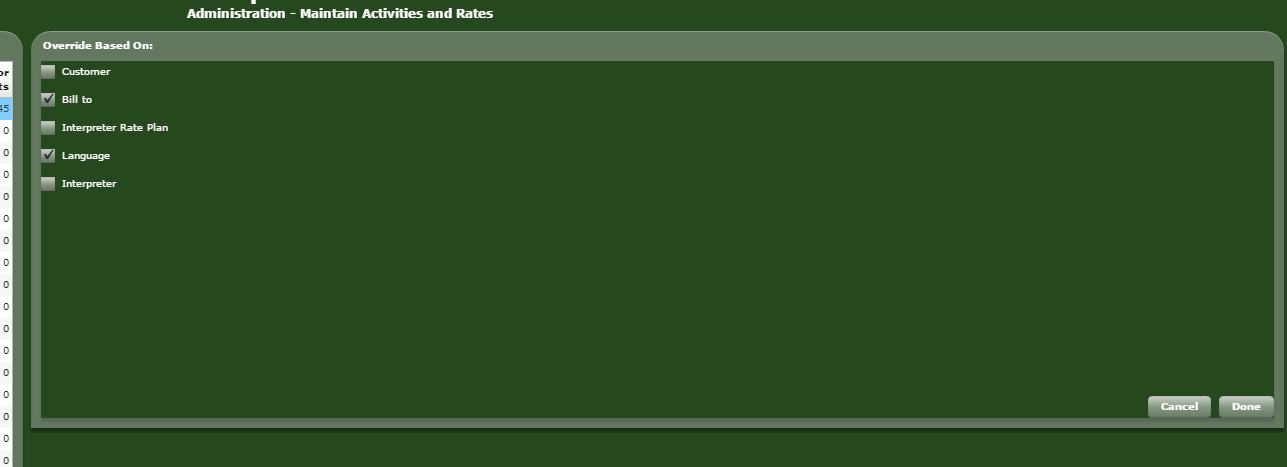
If you want the cost calculation to override, click the 'Add Cost Rate Override' button on the bottom of the screen. You will see something similar to the capture below. There are five criteria for triggering a Cost Override:
1. Customer - This is the Client under Request Location Address in a request.
2. Bill To - This is the Bill To under Request Location Address in a request.
3. Interpreter Rate Plan - This is designated for an interpreter on the Payment Information tab of the Interpreter Profile in Databases>Interpreters. You do not have to use Rate Plans for your interpreters. If you don't, then disregard this criterion.
4. Language - This is the language selected for a request.
5. Interpreter - This would be the interpreter assigned to a request.

You may check more than one and use any combination that makes sense. For example you may have a special rate for an interpreter who speaks a rare language, while other interpreters who speak that language get a standard rate. So you would select the Language and Interpreter. In my example, all interpreters who do work at locations of the Bill To in the selected language will be assured a minimum that is different from the default for the designated language. To fill in these values you click the 'Done' button so you can see the next screen.

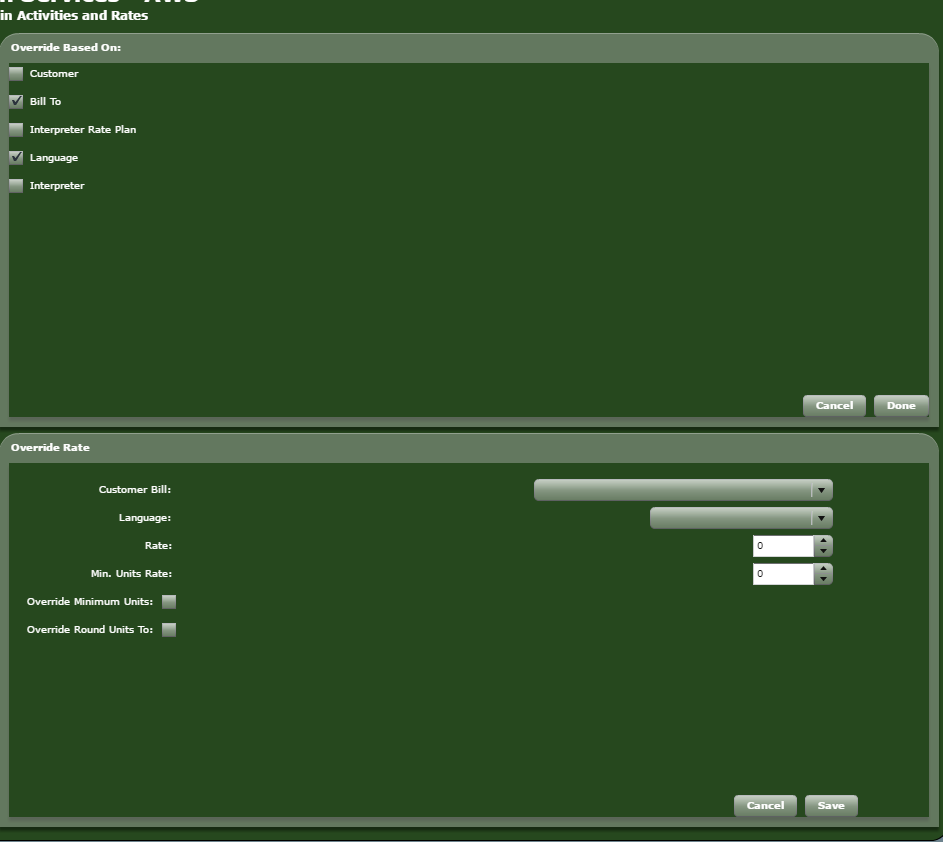
To complete the override, you need to put in the appropriate values:
1. Customer Bill: Choose the Bill To from the drop down box.
2. Language: Choose the Language from the drop down box.
3. Rate: Enter the rate by either typing into the field or using the control.
4. Min Unit Rates: Enter a value here only if it is different from the default. Please Note!! Some customers have confused this field with the Minimum Units Override. It is not. The Min Unit Rates value is only used in 2-tier rates where there is a different rate for the minimum units than for units after the minimum. i.e. You may set a rate where the interpreter gets $25/hr for the minimum hours and if it goes over that, they get $20/hr for units after that.
5. Override Minimum Units: If it is different from the default, then click the check box and put in the value.
6. Override Round Unit To: If you need to change the default rounding units for this override, then click the checkbox and enter the new rounding rule value.
Please Note! If you click the 'Override Minimum Units' or 'Override Round Units To' check boxes they default to 0. If you then save with the box checked, you are setting the minimum or rounding point to 0 unless you have put in another value. To remove that, you need to uncheck the box and then save the override again. This will remove that part of the override completely and it will no longer be set to 0 but will be null.
When you have done this, click Save. The new rule will then be added to the list of overrides.
If you need to edit or delete a rule, simply double click and then change the values or delete it..
